Campaign Communication
Advvy created its notes function to give teams a specific, consolidated area to communicate key campaign topics. Notes are located on the Overview tab of a campaign record in the Timeline grid.
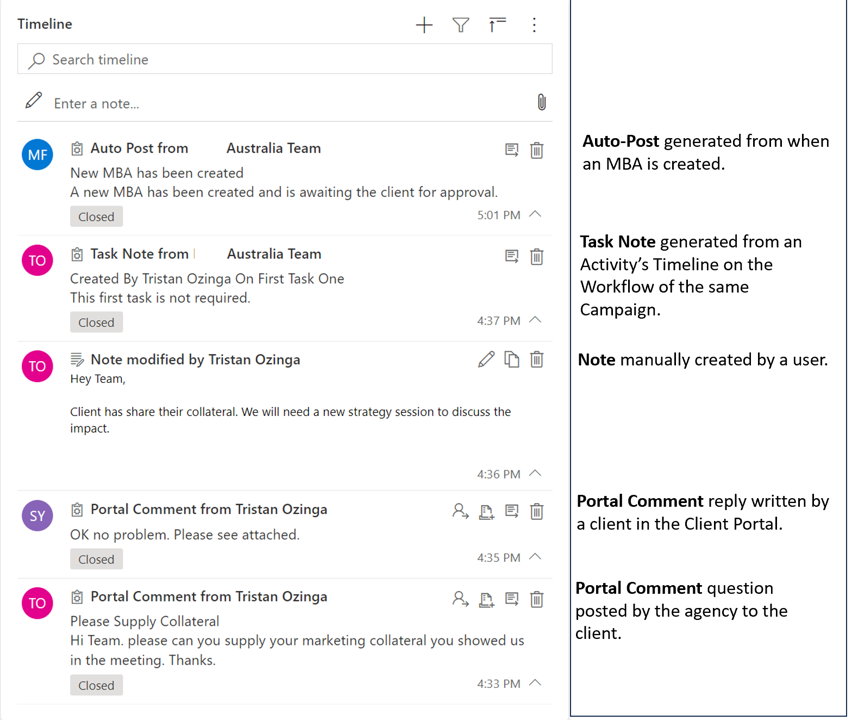
Notes in Advvy are separated into three categories: Notes, Task Notes, Auto Posts and Portal Comments. Each are described below.
Notes
These are your standard notes in Advvy which can be a powerful tool for teams. They can be created by writing directly on the Timeline grid or by hitting the small + in the same location. Notes can hold text information and have attachments added to them. They do not have a subject line or a status attached to them
Task Notes
Each Activity (task) on a workflow also has its own Timeline that can manage discussion specifically for that Activity. Advvy has built a Process Automation to automatically copy the Task Note onto the central Campaign Notes timeline. This maintains visibility for all Notes on all Timelines within a Campaign.
Portal Comments
These notes appear in the client portal after being created and sent, or marked complete. They are a fantastic way to communicate with your clients and keep all communications attached to a specific campaign record.
To create a portal comment, and send it to a specific portal user, follow these steps:
- Enter into the campaign that you want to be associated with the portal comment
- In the timeline grid where notes are located, hit the + sign and click Portal Comment
- The New Portal Comment form will be displayed
- The “From” field will be auto-filled with the user who created the Portal Comment
- Use the “To” field to select the client portal user who will receive the message in the client portal
- The client portal user must be set up before they will be available in this field, for information on this process, see our help guide on How To: Create a Client Portal Login using the Azure Active Directory (AAD)
- Add a subject line to the portal comment, important: the subject will only appear in the Timeline grid of Advvy, it will not be displayed in the client portal.
- Add a description
- The “Regarding” field will auto-populate with the name of the campaign the user is working on
- Remember: Click save in the top left corner of the screen when finished
- Important: After a portal comment is saved, it will NOT appear in the portal. The user must click the “Send” or “Mark Complete” on the ribbon banner of the form to send the note to the portal. When the comment is sent, it is LOCKED for editing, so be sure it’s completely correct.
- The portal comment will appear in the Campaign Details section of the campaign it’s associated with in the Client Portal
Auto-Post
This is a system-generated post from an event that happens on the platform. These need to be set up in Process Automations. Auto-Posts allow for the team to be across events that happen, without having to manually create a note to say they have happened.