Everything you need to know about the Advvy Excel Addin
Installing the Addin
The Advvy Add-In for Excel is an Office 365 “Add-in” that enables data to be transferred from an Excel-based media plan to the Advvy Application.
Your IT Administrators control your permissions to use this app. It is an app that needs to be added to your organisation’s Microsoft Azure environment to allow users to see the Add-in when you launch Excel on the desktop.
Contact your IT administrators to check if this add-in is enabled.
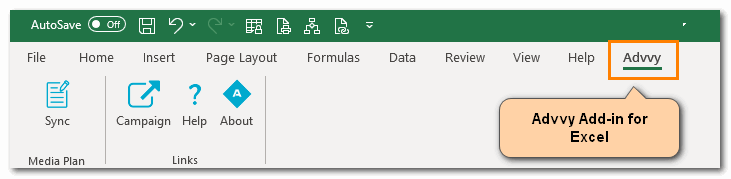
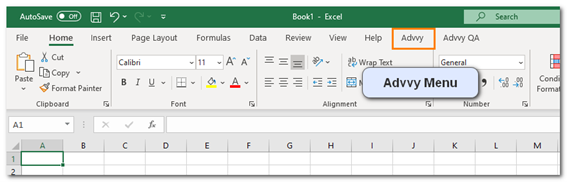
Once available when accessing Excel, the Advvy menu will appear at the top with the other Excel Menu items.
If the add-in doesn’t appear automatically, you can try to manually add it using the following steps.
MANAGED Add-in Steps
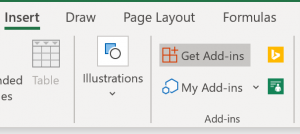
- In the latest version of Microsoft Excel, on the HOME menu click on the [Add-ins] button – See All
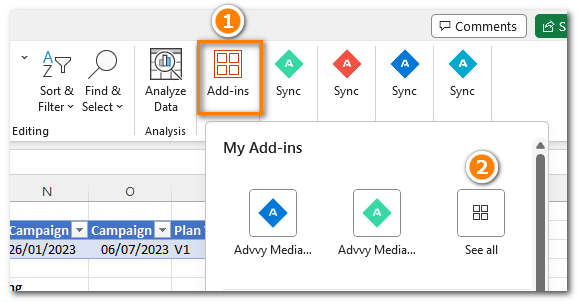 (Previous versions of Excel had the Add-ins on the [INSERT] menu)
- Click on [ADMIN MANAGED] to display the available Add-ins, including the Advvy Media Plan Add-In
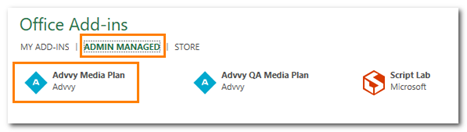
N.B if the Advvy Add-in is not displayed, try the Microsoft Office store steps below. - Click on [Advvy Media Plan] and then click [ADD] at the bottom right.
- The Advvy Menu is now added to Excel and can be used with configured Excel Media Plans.
OFFICE STORE Add-in Steps
- In the latest version of Microsoft Excel, on the HOME menu click on the [Add-ins] button – See All
(Previous versions of Microsoft Excel had the Add-ins on the [INSERT] menu)
- Click on [STORE] to display the available Add-ins, and search for Advvy Media Plan Sync
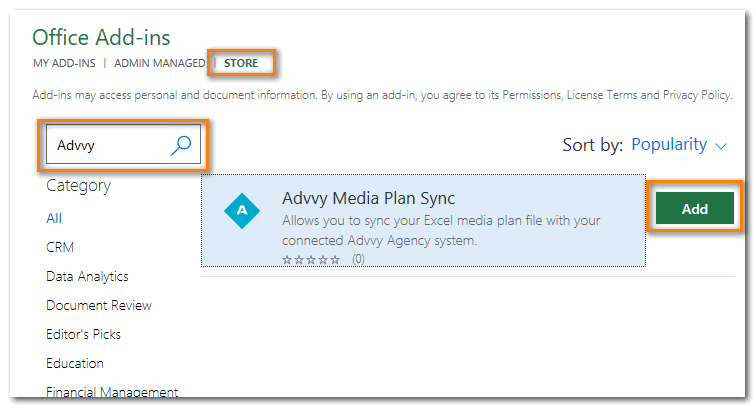
- Click [ADD] and accept the Terms & Conditions to Continue.
- The Advvy Menu is now added to Excel and can be used with configured Excel Media Plans.
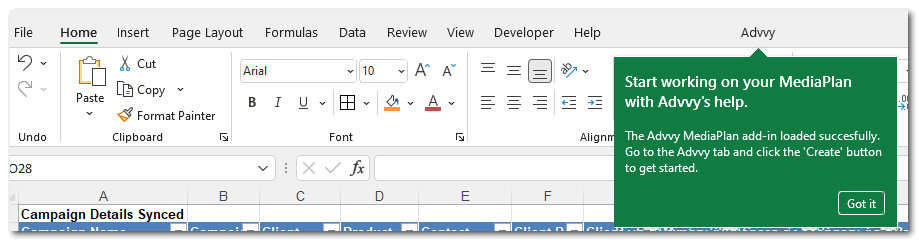
Exploring the Advvy Addin
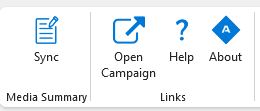
Using the Addin: There are four main buttons when accessing the add-in: Sync, Open Campaign, Help, and About.
About – Opens Advvy.com
Help – Opens Advvy.Help, the help guide you are currently reading.
Open Campaign – This will open up the connected campaign record in a browser.
Sync – Opens up the Advvy Media Plan Configuration Panel. As seen below.
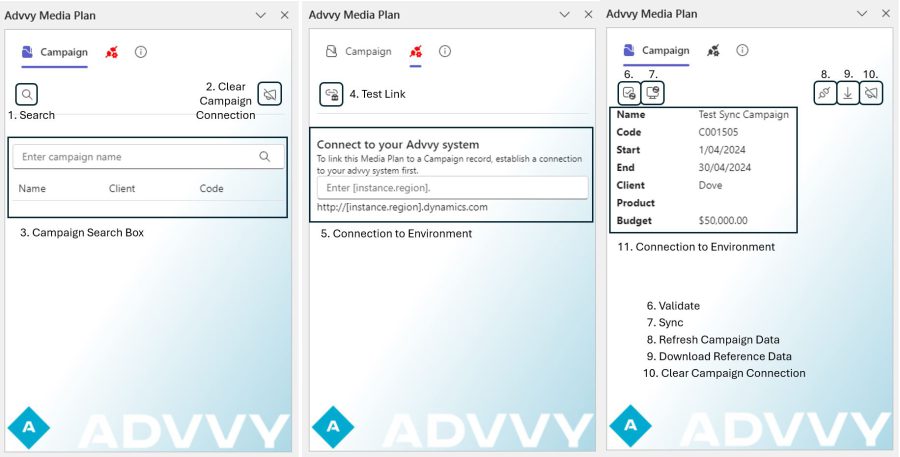
Advvy Navigation Panel
- Search
- Clear Campaign Connection
- Campaign Search Box
- Test Link
- Connection to Environment
- Validate
- Sync
- Refresh Campaign Data
- Download Reference Data
- Clear Campaign Connection
- Campaign Information
How the Addin fits into Advvy
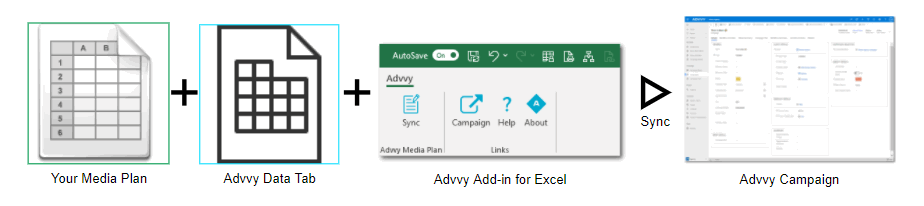
The add-in is essential to Advvy because it bridges Excel media plans and the Advvy platform, seamlessly linking two separate entities to create an integrated workflow.
As media planners, your media plan is the source of truth for your client campaigns.
Once we combine your Media Plan with our Advvy Data tab the plan is ready to be synced to Advvy using the Advvy Add-in for Excel.
All you need is:
- A Campaign to be created in Advvy
- A Media Plan configured for use with Advvy Data tab
- Link the Media Plan to the Advvy Campaign Record
- Sync your plan data to the Advvy Campaign
For this help guide, we’ll focus on Syncing a campaign to Advvy.
Before we do this, please ensure that the 1-3 (listed above) has all been completed.
Sync your Media Plan to your Advvy Campaign using the Advvy Excel Addin.
- On the Advvy Add-in – Click on SYNC to open the Media Plan side-panel.
- Refresh (or press Control + Alt + F5) the campaign’s latest changes to update our Advvy Data tab’s flighting table. (This must be done every time if there are changes to your plan – if the plan says refresh data).
- If no errors are found, Select ‘Sync’ – it should take up to a minute to pick up all of your data and return a completed message.
- Once the sync is complete you may continue to work on your media plan.
Note: Once your data has been picked up by the sync process, depending on the volume of flightings, the data will take time to process in the cloud.
If a subsequent “sync” is actioned before the previous sync has completed processing, a message will display indicating another sync is in progress.
Wait until that sync is complete before attempting to sync your latest updates again.