Setting up New Users
Access to the Advvy product begins with the provisioning of Power Apps License within your corporate Microsoft Office 365 account. Without PowerApps licenses, users will not be able to access Advvy online. The provision of PowerApps licenses is handled by your IT department
Once the valid PowerApps licences are provisioned for your instance, use the following guide to get them access.
Advvy is updating its user guide with Tangos. The old guide for reference is underneath.
Once a user has been granted a Microsoft license, Advvy Administrators can then update the User Profile and manage the level of access the user can have in the product.
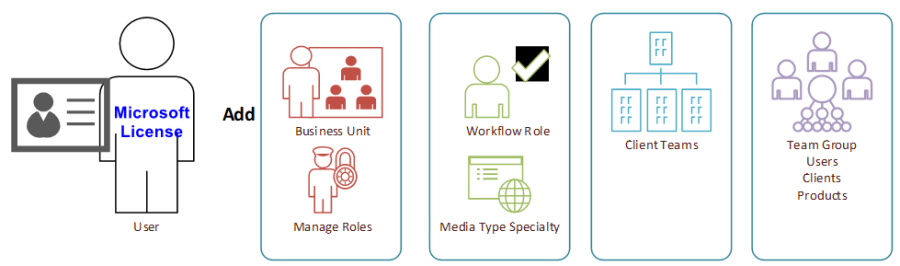
For all New Users the following steps must be followed for a new user to function correctly in Advvy:
- Assign Branch – Assigns the user to a specific branch (Business Unit)
- Assign Roles – Sets the user’s security permissions within Advvy.
- Media Workflow Roles – Assigns a role to a user.
- Client Team membership – Assigns the user to a client team.
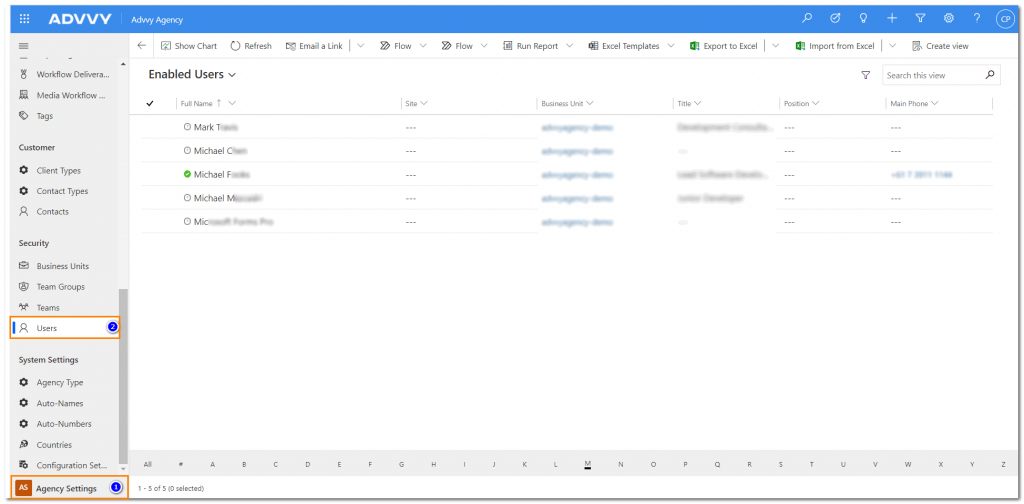
All of these steps are performed in the Agency Settings Area > Security> Users
Assigning a Business Unit Branch to a User
- Navigate to the user’s user record in the Users section in Agency Settings and double click to open the user’s record
- On the Ribbon, click “Assign Branch”
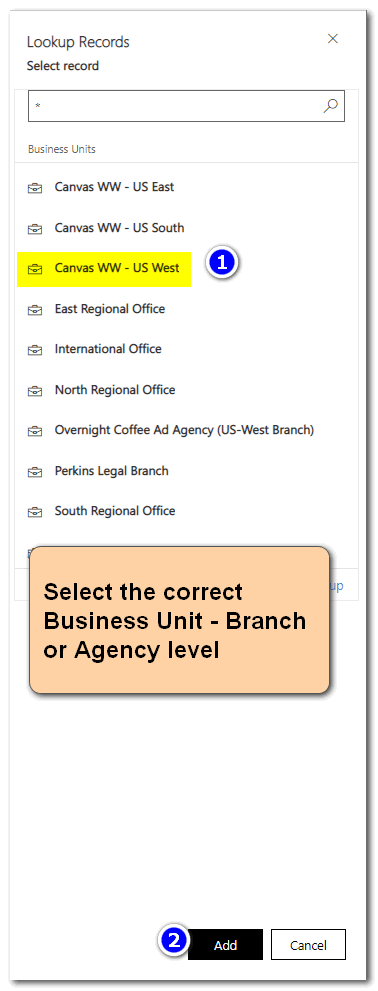
- The lookup records box will appear, select the Business Unit that the user is a part of
- Click [Add]
- Notice the Business Unit field in the Organization Information box has been updated
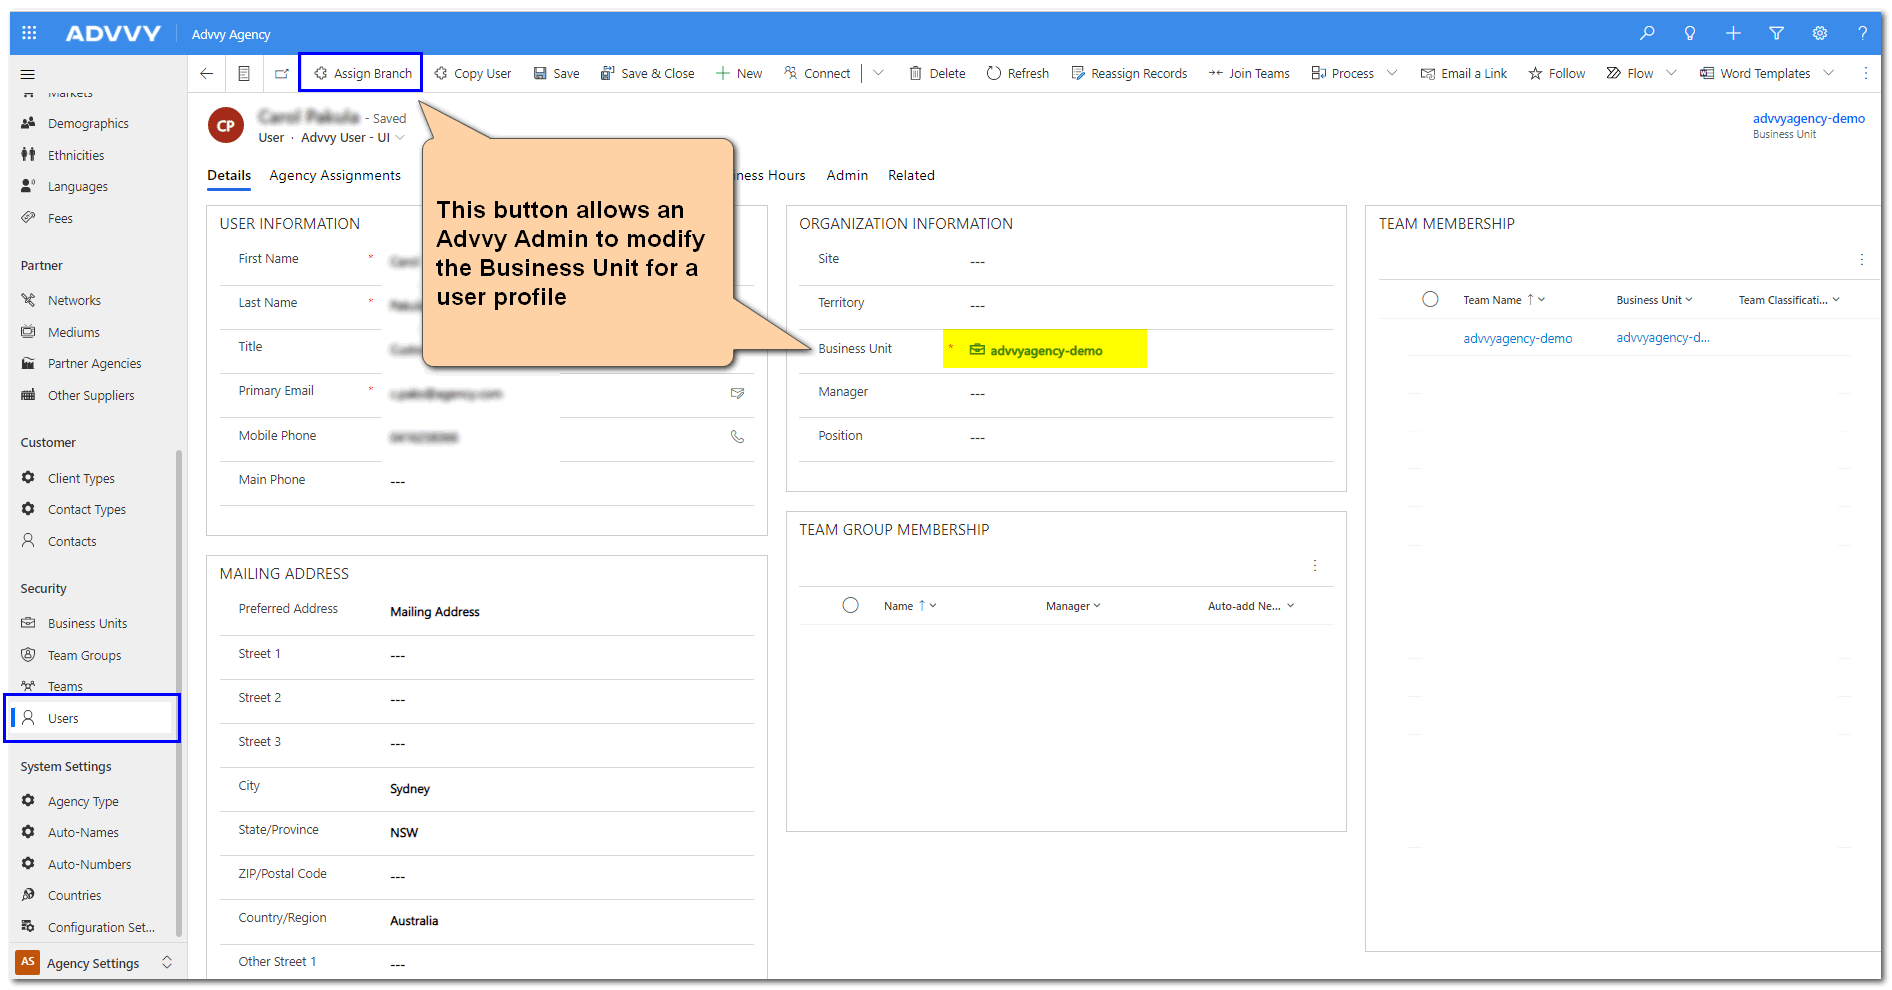
Note: If you change the user’s business unit (Ex. Assigning them to a new branch) it clears the security role. BE SURE re-assign a user’s security role after changing their business unit.
Assigning Security Roles to a User
IMPORTANT: The person assigning security roles to other users must have an admin security role or the Advvy User Management role themselves for the below functionality to work. (Advvy Standard Admin, Advvy Standard Admin, Advvy Tracker Admin, Advvy Tracker Branch Admin, System Administrator)
- Navigate to the user’s user record in the Users section in Agency Setting. Double click to open the user’s record.
- Inside the user record, click the Advvy User – UI drop down menu located directly under the user’s name.
- Select Advvy User – Admin window
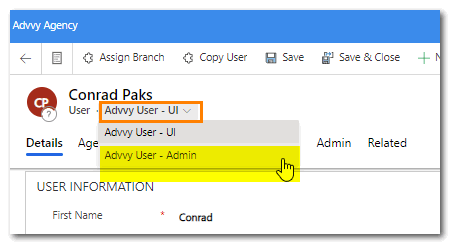
- Once inside the Advvy User – Admin area, check or uncheck user roles to add or remove that role from the user.
- Click save.
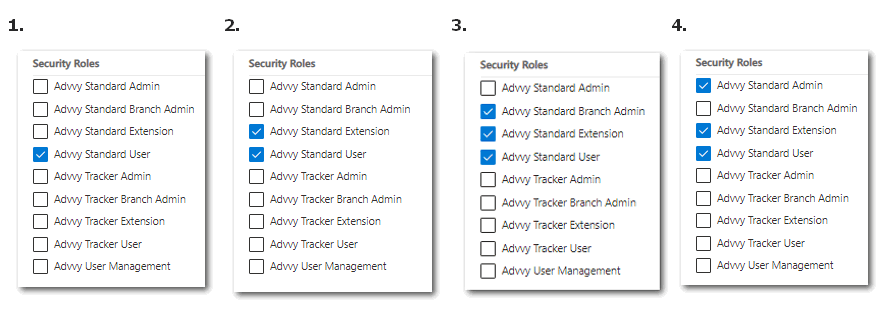
*The Advvy Standard User role is the most common user role in Advvy.
Important: Advvy’s security roles build on one another, so if you want to add an admin role to a user, you must select the Advvy Standard User role first, then the Advvy Standard Admin Role for the user to receive the correct privileges.
- Standard User – is the default setting for all users. This provides access to do most basic functions without the ability to delete records, or create workflows.
- Standard Extension – is for users who are able to create workflow processes and reference master data.
- Standard Branch Admin – provides Admin access to change all settings, user profiles, and reference data limited to only their branch clients and users.
- Standard Admin – provides full admin access to manage the entire Advvy organisation data, security access.
Refer to our Security Roles help guide for a more detailed explanation of security roles in Advvy.
Assigning Media Workflow Roles – For Auto-Assign of Tasks
The Media workflow role assigns a specific role to the user. Users can be assigned multiple roles. Filling in the role is important because it allows Advvy to auto-allocate users to tasks based on their role. More information on this functionality can be found in the Advvy How To: Workflow Allocation Functionalities help page.
To assign a media workflow role, follow these steps:
- Navigate to the user’s user record in the Users section in Agency Settings. Double click to open the user’s record.
- Click on the Agency Assignments
- In the Media Workflow Roles box click the Add Existing Media Workflow Role (it maybe cut off), if this option is not visible, click the three vertical dots to reveal it.
- The Lookup Records box will appear towards the right side of the screen with a Lookup Records field.
- Search for the media workflow role you are looking for. Roles will only be available if they’ve been previously added to Advvy.
*If Media Workflow Roles have not been created, users can create a new record by clicking +New Record button. See Media Workflow Roles in Workflow Management for more information.
Client Team Membership
It’s important for users to be set up correctly within Advvy to ensure they’ll be able to view their campaigns and assign tasks to team members. For this to be possible, the user, client, and client team must all be part of the same Business Unit hierarchy.
Assigning multiple clients to a user can be done by adding the User to a Team Group, or in the User profile clients can be added individually:
- Navigate to the user’s user record in the Users section in Agency Settings. Double click to open the user’s record.
- In Team Membership- select the menu … and Click on Add Existing Team
- Click on one or more clients from the list and then click Add.
- The user will now have access to view Client information for the selected clients.

The next section will outline more about Client Teams in Advvy
Previous article: 4 Setting up a Workflow Structure Next article: 6 Client Team Management